
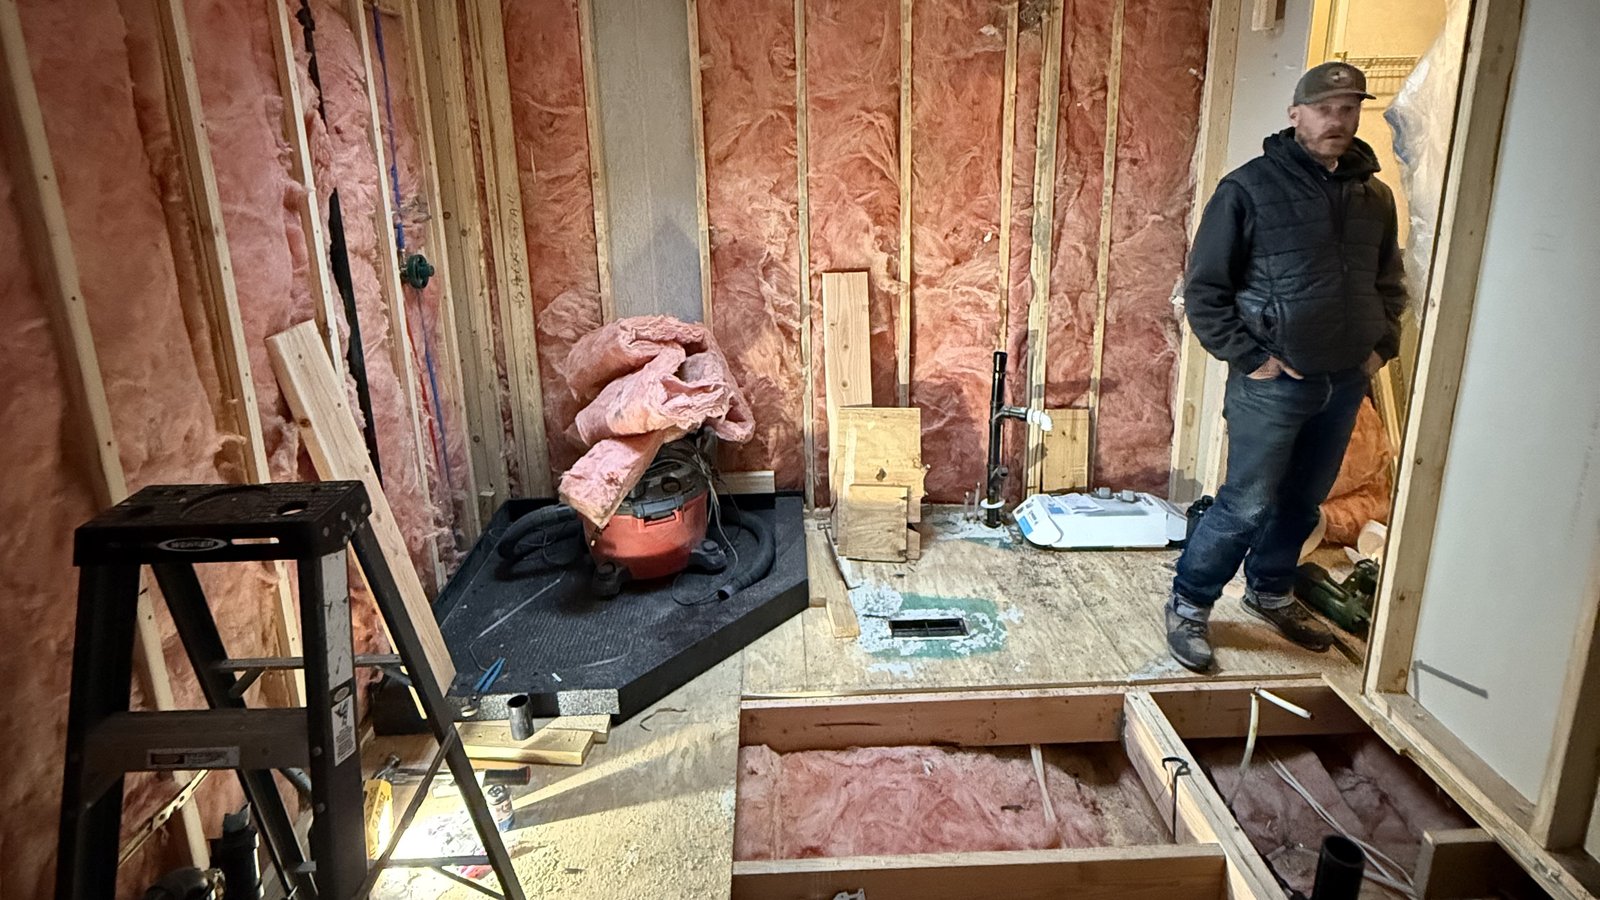
A finished basement in Colorado Springs typically costs $50 to $100 per square foot for a permitted finish, or about $40,000 to $100,000 for an average 800 to 1,000 square foot basement. That range moves on permits and code as much as finish level: PPRBD (the Pikes Peak Regional Building Department) requires a full plan review with building, electrical, and mechanical permits, plus egress windows, minimum ceiling height, and a look at radon, since El Paso County sits in the EPA’s highest-risk radon zone. Skip any of that and you’re not saving money, you’re setting up a problem for the next inspector, appraiser, or buyer (I’ve seen it kill deals). Here’s how the cost, permits, and code requirements actually break down.
What Does a Finished Basement Cost in Colorado Springs?
Finished basement cost in Colorado Springs typically runs $50 to $100 per square foot, depending on the scope and finish level. That price is for a permitted finish: framing, insulation, drywall (hung and finished by a drywall sub), flooring, trim, and electrical and plumbing done by licensed trades. For an average 800 to 1,000 square foot basement, that puts most projects in the $40,000 to $100,000 range.
What moves the price within that range:
- Basic finish (framing, insulation, drywall, paint, standard carpet or LVP flooring, recessed lighting, baseboard trim): the low end of the range, around $50 to $65 per square foot.
- Mid-range finish (upgraded flooring, a full bathroom, better lighting design, a media area): the middle to upper end, around $65 to $85 per square foot.
- High-end finish (wet bar or kitchenette, custom built-ins, home theater, high-end tile): runs around $85 to $100 per square foot and can go past it depending on the features.
A few line items that aren’t included in a basic per-square-foot number:
- Adding a bathroom typically adds $15,000 to $25,000, depending on how far the new plumbing has to run from the existing waste line (the pipe that carries wastewater to the sewer).
- Adding an egress window where the basement doesn’t already have one usually runs $2,500 to $5,500 per window, including cutting the foundation opening, pouring the window well, and grading for drainage. Rocky soil or a deep well can push costs higher.
- Radon testing and mitigation, covered in detail below, adds another $150 to $2,800 depending on whether your basement needs a system at all.
These are real ranges for real Colorado Springs projects, not national averages. Get a written, itemized estimate before signing anything, and treat any quote that skips permits or egress entirely as a red flag rather than a discount (I’ve seen that exact shortcut in a lowball bid, and it never ends well for the homeowner).
What Is the PPRBD Permit Process for a Basement Finish?
Basement finishing is one of the projects that most reliably needs a permit, and PPRBD (the Pikes Peak Regional Building Department) treats it as a full plan review, not a same-day counter permit.
Who needs the permit: Anyone finishing an unfinished basement into living space in Colorado Springs, unincorporated El Paso County, Monument, Fountain, Manitou Springs, Palmer Lake, or Green Mountain Falls. All of these fall under PPRBD and the same Pikes Peak Regional Building Code, so the requirements don’t change if you’re doing the project in Monument instead of downtown Colorado Springs. Monument’s own planning office may weigh in on site-specific questions, but the building permit itself is a PPRBD permit.
What the permit covers: A full basement finish needs, at minimum, building, electrical, and mechanical permits. If you’re adding a bathroom, wet bar, or any new plumbing, you’ll also need a plumbing permit. PPRBD requires plans that show:
- The egress window locations and sizes
- Smoke detectors and carbon monoxide detectors in the required locations
- Ventilation for any new bathroom (PPRBD requires a bathroom exhaust fan that moves at least 50 CFM, cubic feet of air per minute, and vents to the outside rather than into the attic)
- Framing and insulation details
Adding a bedroom: If your plans label a basement room as a bedroom, and your home is on a septic system rather than city sewer, PPRBD will also require documentation from the health department confirming the septic system is sized for the added bedroom count.
Inspections: Expect a rough-in inspection (framing, electrical, plumbing, and mechanical before drywall goes up) and a final inspection. Inspectors need to see the actual wiring, ducting, and plumbing, not the finished wall over it, so don’t drywall over anything until it’s passed rough-in. I’ve had to send a crew back to open a wall for exactly this reason, and it’s a conversation I’d rather not have twice. If an inspector later needs to verify something you’ve already closed up, you’re the one responsible for opening the wall back up and repairing it afterward.
Timeline: Budget 1 to 3 weeks for plan review on a standard basement finish, longer if your plans are incomplete or if you’re adding a bedroom and need septic sign-off. Build this into your project schedule before committing to a contractor start date.
For a broader look at what does and doesn’t need a permit on other remodeling projects, see our PPRBD permit guide.
What Egress Window Rule Trips Up the Most Basement Projects?
Egress is the requirement that catches the most homeowners off guard, so it’s worth explaining in plain terms. Egress means a legal escape route: a window or door big enough for a person to climb out through in a fire, and big enough for a firefighter in full gear to climb in through to reach someone. Under the 2021 International Residential Code, which PPRBD has adopted, the rule applies more broadly than most people expect.
Every basement bedroom needs an egress window, no exceptions. But the rule doesn’t stop at bedrooms: any basement room finished as living space (a family room, a home office, a den) also needs an egress opening under the current code, not just rooms used for sleeping. The one exemption is a basement used only to house mechanical equipment, and only if that space is 200 square feet or smaller.
The specific numbers PPRBD checks for:
- Clear opening: at least 5.7 square feet of open space to climb through (5.0 square feet is allowed for a window at ground level, since there’s no well to climb up out of).
- Minimum height: the clear opening must be at least 24 inches tall.
- Minimum width: at least 20 inches wide.
- Sill height: the bottom of the window opening can’t sit higher than 44 inches above the finished basement floor. If your existing window sits higher than that, ask PPRBD’s plan reviewer about your options. A framed interior step or platform under the window is sometimes an acceptable fix, but the details need to be confirmed with PPRBD directly rather than assumed.
If the window sits below ground level, it needs a window well in front of it. The well itself has minimum dimensions too: at least 9 square feet of area, with the well projecting out from the house at least 36 inches. If the well is deeper than 44 inches, it also needs a permanently attached ladder or steps so a person can climb out of the well itself, not just through the window.
Retrofitting an egress window into an existing basement means cutting a new opening in the foundation, so it’s real construction work, not a simple window swap (this catches a lot of homeowners off guard, since it sounds like a same-day job and isn’t). That’s reflected in the $2,500 to $5,500 typical cost mentioned above.
What Ceiling Height Do Colorado Springs Basements Need?
Basements often have less headroom than the rest of the house because of ductwork, beams, and plumbing running along the ceiling, so ceiling height is worth checking before you commit to a full finish.
Under the 2021 IRC, as adopted by PPRBD:
- Any room used as living space (bedroom, family room, office) needs a ceiling height of at least 7 feet, measured from the finished floor to the lowest point of the finished ceiling. That means if you’re planning to box in a duct or a beam, the finished height under that box still has to clear 7 feet.
- Basement areas not used as living space (a mechanical room, unfinished storage) need at least 6 feet 8 inches, though a specific beam or obstruction is allowed to dip as low as 6 feet 4 inches at that one spot.
- Bathrooms and laundry rooms need at least 6 feet 8 inches.
This is one of the reasons a pre-finish walkthrough matters. If your basement has a low duct run or a support beam in the middle of the room, it can determine whether a bathroom fits where you want it, or whether a duct needs to be rerouted before framing starts. Finding that out at the framing stage, rather than during the permit plan review, saves real time and money.
How Do Moisture and Radon Affect a Basement Differently?
A basement is the one part of the house in direct contact with the ground, so it deals with two things the rest of the house doesn’t: moisture and radon.
Moisture: Before finishing any basement, check for signs of past water intrusion (staining on the foundation wall, a musty smell, efflorescence, which is the white chalky mineral residue left behind when water seeps through concrete and evaporates). Any of these should be resolved before you frame and insulate, not covered up by them (covering up a moisture problem instead of fixing it is one of the most expensive mistakes I see on a basement job). Framing should sit slightly off the concrete floor and away from exterior walls where practical, and insulation choices matter: rigid foam board against the foundation wall handles moisture better than fiberglass batts installed directly against concrete. If you’re not sure whether what you’re looking at is active moisture or mold, our guide on mold versus mildew explains how to tell the difference.
Radon: This is the bigger, less visible issue for Colorado Springs specifically. Radon is a naturally occurring, odorless gas that comes up from the ground through soil and rock, and El Paso County sits in EPA Radon Zone 1, the agency’s highest-risk category. Local testing data shows roughly 4 in 10 homes tested in El Paso County come back above the EPA’s action level of 4 picocuries per liter.
PPRBD doesn’t require a radon test as a condition of issuing a basement finish permit, but testing before you close up the walls is one of the best-timed decisions you can make on this project. A radon test is inexpensive: a DIY kit runs $15 to $25, and a professional test runs $150 to $300. If your basement comes back elevated, a mitigation system (a vent pipe and fan that pulls radon from under the slab and exhausts it above the roofline) typically costs $800 to $2,500 installed in Colorado Springs. Installing the piping while the walls are still open, before drywall goes up, is far cheaper and less invasive than retrofitting it into a finished basement later.
What Is the Typical Sequence for a Basement Finish?
Most basement finishing projects in Colorado Springs follow a similar order:
- Plan and permit. Confirm layout, egress window locations, and bathroom placement. Submit plans to PPRBD and wait for permit approval before any demo or framing starts.
- Test for radon and address moisture. Do this before framing goes up against the foundation walls.
- Rough-in electrical, plumbing, and mechanical. New circuits, any new plumbing lines, ductwork extensions, and the radon vent pipe (if needed) all get roughed in before insulation and drywall.
- Framing and insulation. Frame walls, install the egress window and well if you’re adding one, and insulate exterior walls (rigid foam plus batt insulation is a common Colorado Springs approach for basement walls).
- Rough-in inspection. PPRBD inspects the open walls before anything gets covered.
- Drywall, paint, and flooring.
- Trim, fixtures, and final details.
- Final inspection. PPRBD signs off, and the permit closes.
Skipping steps, especially the plan review and rough-in inspection, is exactly what surfaces as unpermitted work when the house eventually sells. Buyers’ inspectors know what a basement bedroom without an egress window looks like, and lenders routinely require unpermitted work to be fixed or exposed for inspection before they’ll fund a loan. Our interior remodeling service in Colorado Springs covers a basement finish from plan review through final inspection.
For help with permits, egress window installation, or planning a basement finish anywhere in Colorado Springs, Monument, or El Paso County, call (719) 243-9718.
Questions people ask
Do you need a permit to finish a basement in Colorado Springs?
Yes. PPRBD, the Pikes Peak Regional Building Department, requires a permit and plan review for basement finishing in Colorado Springs, Monument, and the rest of El Paso County. A full finish needs building, electrical, and mechanical permits at minimum, plus a plumbing permit if you're adding a bathroom or wet bar. The plans have to show egress windows, smoke and carbon monoxide detectors, and ventilation before PPRBD will issue the permit.
How much does it cost to finish a basement in Colorado Springs?
Most finished basement projects in Colorado Springs run $50 to $100 per square foot for a permitted finish, or roughly $40,000 to $100,000 for an average 800 to 1,000 square foot basement with framing, insulation, drywall, flooring, trim, and lighting. Adding a bathroom typically adds $15,000 to $25,000 depending on how far the plumbing has to run. A new egress window where none exists usually adds $2,500 to $5,500 per window. High-end finishes with a wet bar, custom built-ins, or a home theater push past $100 per square foot.
Does a basement bedroom need an egress window in Colorado Springs?
Yes, and the requirement is broader than just bedrooms. Under the 2021 IRC as adopted by PPRBD, any basement room used as living space needs an egress window or door, and every basement bedroom needs one specifically. The opening has to give at least 5.7 square feet of clear space to climb through, be at least 24 inches tall and 20 inches wide, and have a sill no more than 44 inches above the floor. The only exemption is a basement used solely for mechanical equipment and no larger than 200 square feet.
Is Monument, CO under the same building code as Colorado Springs?
Yes. Monument, along with unincorporated El Paso County, Fountain, Manitou Springs, Palmer Lake, and Green Mountain Falls, is served by PPRBD and follows the same Pikes Peak Regional Building Code. A basement finish in Monument needs the same permits, the same egress windows, and the same inspections as one in Colorado Springs. The Town of Monument's own planning office may also be involved for site-specific questions, but the building permit itself comes from PPRBD.
Does my Colorado Springs basement need a radon test before I finish it?
El Paso County sits in EPA Radon Zone 1, the highest risk category, and roughly 4 in 10 homes tested locally come back above the EPA action level. PPRBD doesn't require a radon test as a condition of the permit, but testing before you close up the walls is strongly recommended. If levels come back high, a mitigation system is far cheaper and easier to install before drywall goes up than after. A professional test runs $150 to $300, and a mitigation system typically costs $800 to $2,500 installed in Colorado Springs.
Ready to Get Started?
Flat-rate written estimate, no hourly surprises. Serving Colorado Springs, Monument, Fountain, Woodland Park, and the Pikes Peak region.